A pessary fitting appointment succeeds or fails based on the quality of what happens between the pelvic exam and the moment the patient stands up to test. This guide covers each step in sequence: pre-exam assessment, sizing by shape, step-by-step technique, post-void residual check, kit selection, and follow-up scheduling.
Before the Fitting — Patient Assessment
Confirm the following before opening the fitting tray:
- POP-Q stage and compartment (anterior, posterior, apical, or combined): stage and anatomy guide the choice between support and space-filling shapes.
- SUI component: concurrent stress urinary incontinence points toward a knob-bearing variant (ring with knob, dish with knob).
- Sexual activity status: space-filling pessaries (Gellhorn, cube, donut) are not compatible with vaginal intercourse.
- Self-management ability: patients who cannot insert and remove independently require clinician-managed follow-up every 3 months.
On pelvic exam, assess vaginal length, introitus caliber, and tissue integrity. Vaginal length under 7.5 cm is associated with higher failure rates per Bugge et al., Cochrane 2020. Active ulceration or erosion precludes immediate fitting—address the tissue issue with local estrogen first, then reschedule.
Per the AUGS-SUNA Clinical Consensus Statement (2023), risk factors for failure include short vaginal length, large levator hiatal area on Valsalva, prior hysterectomy, prior prolapse surgery, elevated BMI, and concurrent SUI. These inform but do not exclude a trial—offer a pessary trial to all women with symptomatic POP.
Selecting the Starting Shape
The ring or ring with support is the default first-line choice for most presentations. Escalate when two or more ring sizes fail Valsalva testing, the largest available size provides inadequate support, or anatomy clearly favors space-filling retention. For detailed decision logic, see the pessary shape-by-shape decision guide.
Pessary Sizing by Shape
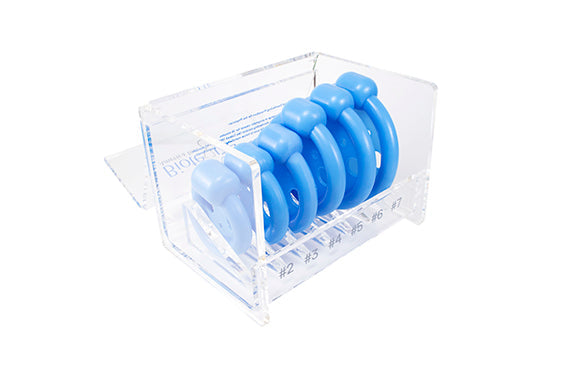
The table below covers available size ranges for each shape in the Minerva catalog. Ring sizes in inches: size 2 ≈ 2.0 in (51 mm); size 3 ≈ 2.25 in (57 mm); size 4 ≈ 2.5 in (64 mm); size 5 ≈ 2.75 in (70 mm); size 6 ≈ 3.0 in (76 mm); size 7 ≈ 3.5 in (89 mm). Cube sizes span approximately 35 mm (size 0) to 75 mm (size 7).
| Shape | Size range (Minerva) | Starting point | Fitting set |
|---|---|---|---|
| Ring / Ring with Support | Sizes 2–7 (51–89 mm / 2.0–3.5 in) | Size 3–4 for most; size 2 for narrow caliber; 5–7 for wider introitus | Ring Fitting Set / Ring with Support Fitting Set |
| Ring with Knob | Sizes 2–7 (same as ring) | Same as ring; orient knob at 12 o’clock (anterior) for SUI management | Ring with Knob Fitting Set |
| Cube | Sizes 0–7 (35–75 mm) | Start at size 3–4; up for large introitus, down if retention is already strong | Cube Fitting Set |
| Gellhorn | Short/long stem; disc 1.5–3.5 in (38–89 mm) | Match disc to vault width; long stem eases removal; short stem suits active patients | Gellhorn Fitting Set |
| Oval / Marland | Parallel ring range; oval cross-section | Use when ring fails to retain; oval profile aids retention with slight introital narrowing | Oval Fitting Set / Marland Fitting Set |
| Dish | Parallel ring range | Low-profile; start one size up from the ring equivalent; good for mild anterior prolapse in active patients | Dish Fitting Set |
| FlexiShelf | Sizes 6–12 (larger anatomy range) | Start at size 6–8 for most candidates; intended for larger vaginal dimensions | FlexiShelf Fitting Set (sizes 6–12) |
Start with the middle of the available size range and adjust based on retention during Valsalva testing. A pessary that descends on Valsalva is too small; one that causes discomfort or urinary obstruction is too large.
The Fitting Technique — Step by Step
A vaginal pessary must be fitted by a trained clinician. Shape and size selection requires pelvic examination; no remote or self-selection protocol is appropriate.
- Lubricate and prepare: Apply water-based lubricant. Fold or compress ring-type pessaries for insertion. Lubricate the Gellhorn disc and stem. Compress the cube fully before introduction.
- Insert at the correct angle: Introduce the pessary at approximately 45° toward the posterior vaginal fornix, following the natural vaginal axis. Do not force against resistance.
- Seat the pessary: Allow ring-type pessaries to spring open. The posterior edge seats in the posterior fornix; the anterior edge sits behind the pubic symphysis. For Gellhorn, tilt the disc to horizontal and confirm the stem points toward the introitus.
- Confirm fit at rest: A single examining finger should pass between the ring rim and the vaginal wall. The patient should not feel the pessary at rest.
- Dynamic testing: Have the patient stand, ambulate, cough, and perform Valsalva. A pessary that descends to or beyond the introitus has failed—trial the next size up or a different shape.
- Check voiding and PVR: Have the patient void. Voiding difficulty or incomplete emptying suggests the pessary is too large or causing urethral obstruction. Obtain a post-void residual before discharge.
- Document each trial: Record shape, size, and reason for failure for every pessary trialed, not only the one retained.
Post-Void Residual (PVR) Assessment
The AUGS-SUNA 2023 consensus recommends PVR assessment after fitting in symptomatic or at-risk women. A correctly fitted pessary may improve bladder emptying by relieving urethral kinking from anterior wall prolapse; an oversized pessary may create new obstruction. A post-fitting PVR above 150 mL warrants removal or downsizing. Document PVR at fitting and at the 4-week follow-up.
Fitting Kit Selection for Your Practice
A minimum effective kit for an OB/GYN or urogynecology service covers five shapes: ring, ring with support, ring with knob, Gellhorn, and cube. These five sets cover the large majority of initial fittings for POP and mixed POP + SUI. Browse the Minerva pessary fitting kit collection for Dish, Oval, Marland, and FlexiShelf sets.
Follow the manufacturer’s IFU for reprocessing between patients. Most silicone fitting sets tolerate soap-and-water cleaning followed by a compatible disinfectant; verify against your institution’s infection prevention protocols.
Follow-Up Schedule
Per ACOG Practice Bulletin 214, follow-up is recommended every 3–4 months for clinician-managed patients and annually for self-managing patients. The AUGS-SUNA 2023 consensus recommends the first visit within 4 weeks of fitting.
- 4-week visit: confirm fit, inspect vaginal walls, clean pessary, reassess PVR if borderline, address self-management technique.
- Every 3 months (clinician-managed): remove, inspect, clean, reinsert; document vaginal wall status using the AUGS-SUNA 4-tier classification (1 = erythema, 2 = abrasion, 3 = erosion/ulceration, 4 = fistula).
- Every 6–12 months (self-managing patients): clinical inspection even for independently managing patients.
Tier 3 findings (erosion/ulceration) require pessary removal and local estrogen treatment before reinsertion. Tier 4 (fistula) requires urgent urogynecology referral. Escalation triggers: purulent, malodorous, or blood-tinged discharge; new pelvic pain; difficulty voiding; vaginal bleeding; or inability to remove the pessary.
Documentation and Coding
A complete fitting note includes: indication (POP-Q stage and compartments, SUI component), pessary shape and size fitted, each failed trial with reason, PVR value, patient education topics, and next follow-up date. CPT 57160—fitting and insertion of a pessary or other intravaginal support device—covers the fitting visit. For coding and reimbursement detail, refer to the Pillar 3 cluster on pessary CPT coding.
For the full indications and shapes overview, see the vaginal pessaries clinical guide. For step-by-step insertion technique by shape, see the pessary insertion guide.
Frequently Asked Questions
What size ring pessary should I start with?
Size 3 or 4 from the Ring Fitting Set (sizes 2–7) is the starting point for most patients. Size 3 ≈ 57 mm (2.25 in); size 4 ≈ 64 mm (2.5 in). Narrow caliber or short vaginal length may fit better in size 2; wide introitus or long vault typically requires sizes 5–7.
How do I know if a pessary is the correct size?
A correctly fitted pessary meets four criteria simultaneously: the patient cannot feel the device at rest, a single examining finger passes between the rim and the vaginal wall, the pessary is retained during Valsalva and ambulation, and the patient voids normally. A pessary that drops on Valsalva is too small; discomfort or urinary obstruction indicates too large.
What is the PVR threshold for concern after pessary fitting?
A post-fitting PVR above 150 mL warrants pessary removal or downsizing before discharge. Per the AUGS-SUNA 2023 consensus, PVR assessment is recommended after fitting in symptomatic or at-risk patients. Compare the post-fitting value to any available pre-fitting baseline for the most actionable interpretation.
How often should a fitted pessary be evaluated by a clinician?
First follow-up within 4 weeks per the AUGS-SUNA 2023 consensus; then every 3 months for clinician-managed patients and every 6–12 months for self-managing patients per ACOG guidance.
What fitting kits should a gynecology clinic stock as a minimum?
Ring, ring with support, ring with knob, Gellhorn, and cube fitting sets form the functional minimum for a gynecology or urogynecology service. All five are available from the Minerva fitting kit collection.
This article is for informational purposes for healthcare professionals. It does not constitute medical advice or replace clinical judgment. Always follow your institution’s protocols and the manufacturer’s instructions for use.


